In this article, I would like to describe techniques that make a digital human look more real to viewer. We will mainly use Unity to show the examples, but the workflows should be applicable for other engines and environments as well.
Height map from Texture
One challenging thing in photogrammetry is, that a lot of details of the captured model are decimated during the process. In the end you have a low or mid poly model to load into Unity, but all the details of the face and skin are not represented on the mesh. Adding a texture helps to re-add a lot of those features and make a human already look more realistic.

The problem with just adding the texture is, that small pores and wrinkles on the skin get blurred and do look very flat. To conquer this flatness, we are able to add a normal map to add a bit more structure to the face.
The problem is, that we first have to create this normal map, which takes a lot of time. The method proposed here is very simple and fast but already gives good results.
DFT for Detail Extraction
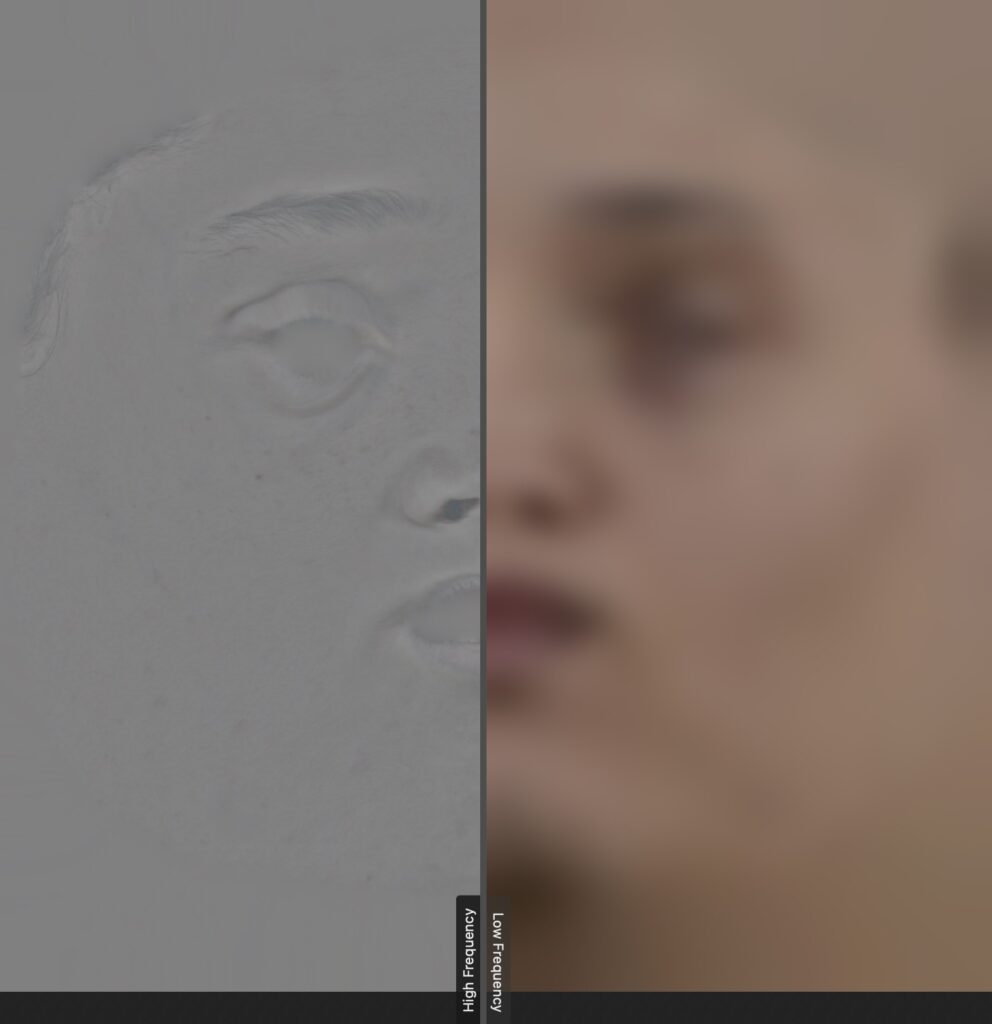
The approach is based on the 2d discrete fourier transform, which allows us to transform any given image into its frequency spectrum. In the frequency spectrum, it is very simple to extract either the lower frequencies (low pass filter) which is used for various image compressions, or we can do the opposite approach and extract the high level features.
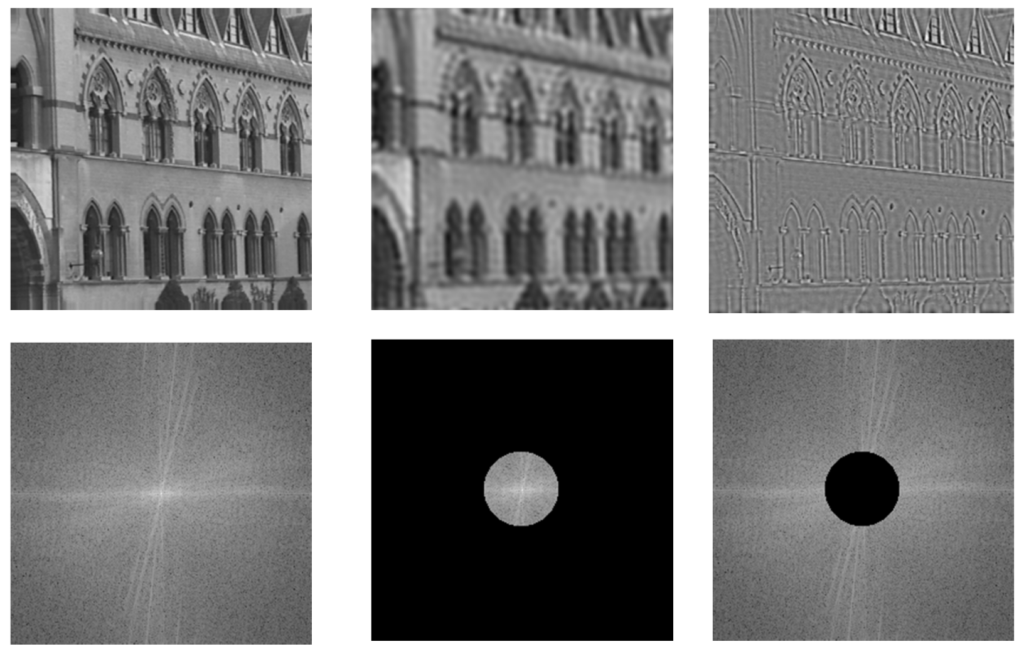
Source: robots.ox.ac.uk
And exactly these high level features are the ones we are looking for to create our hight map and re-apply to our model. To extract the high level features, you can use tools like ImageJ which are free to use. Most modern graphics tools like Photoshop or Affinity Photo (search for High-Pass filter) also contain methods to extract these details.
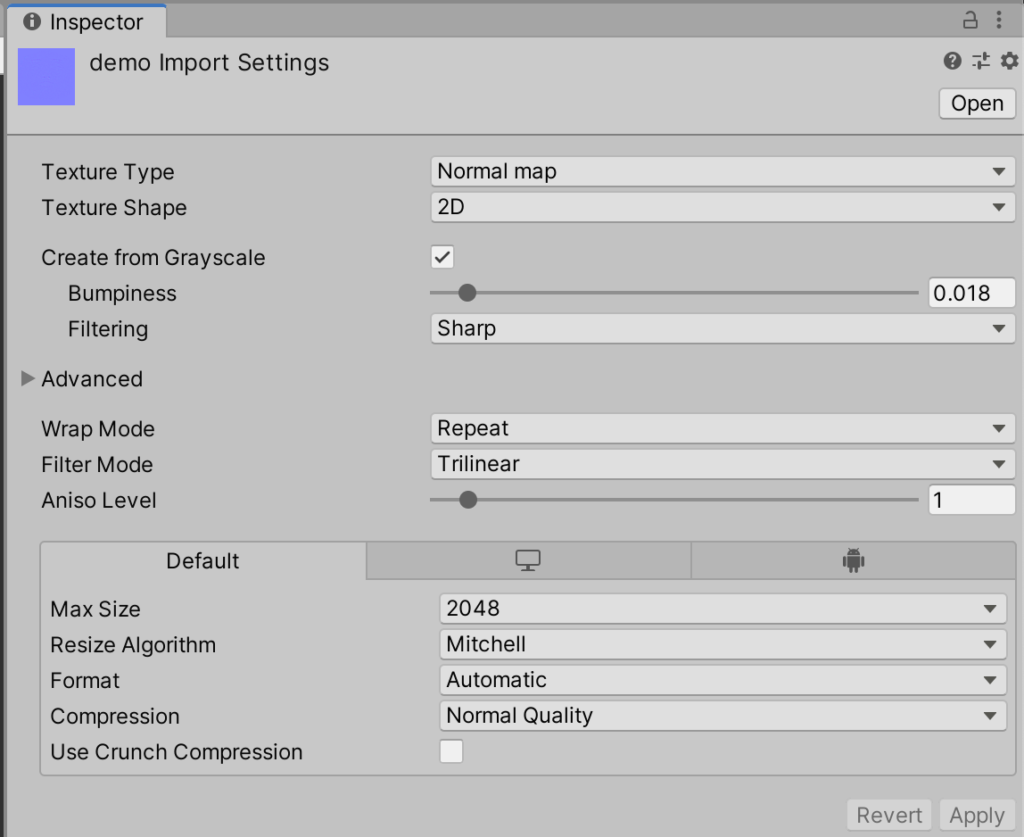
The extracted high frequency image can now be loaded into unity and converted into a normal map. For that you have to change the texture type to Normal Map and tell unity to Create from Grayscale.
I would recommend to set the Bumpiness to a very low value, otherwise the pores looks very unrealistic. You can redo this process as long as you want to achieve the intended results.
The very last step is to apply the normal map to the material of the face model and look at the result. If the model still looks flat, increase the Bumpiness, if it looks too bumpy, decrease it.
Results
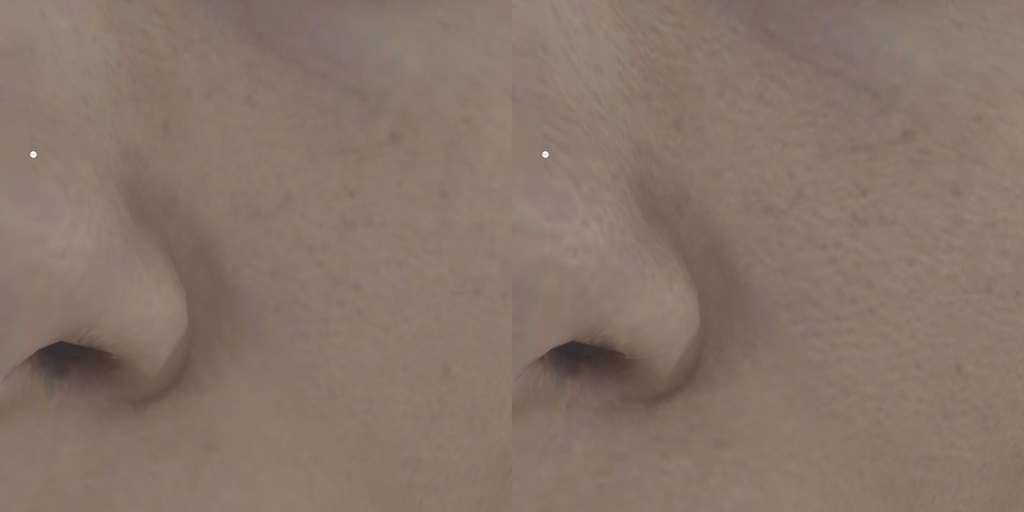
Here you see now the final result, using the models texture and the created height map to add details.
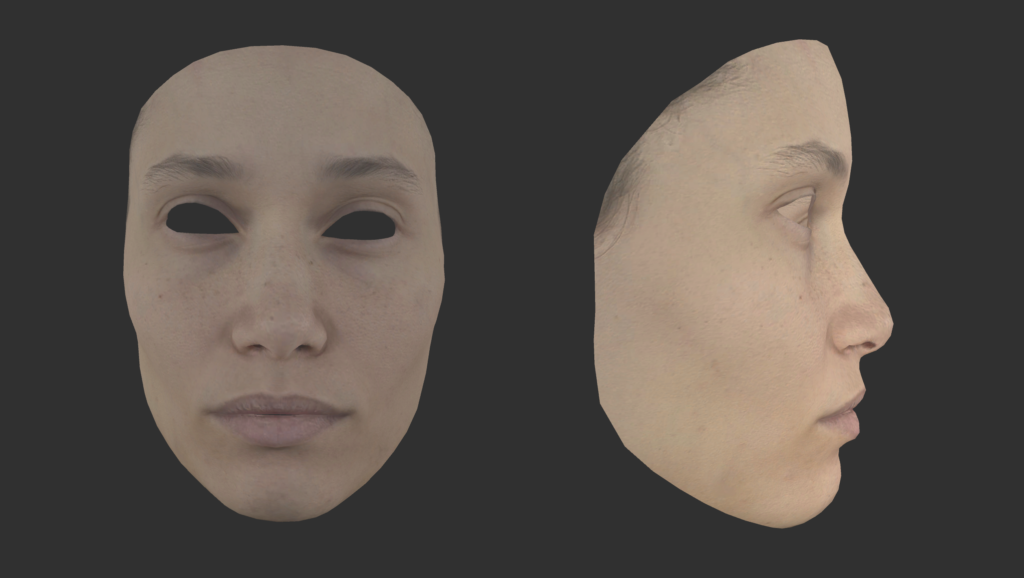
Further this approach would also be possible to be used in real-time to create and apply wrinkle maps from captured textures.