Rig Setup for Mocap
The Advanced Skeleton Rigging Tool is needed for this step. It is currently not installed on the Innovation Lab computers.
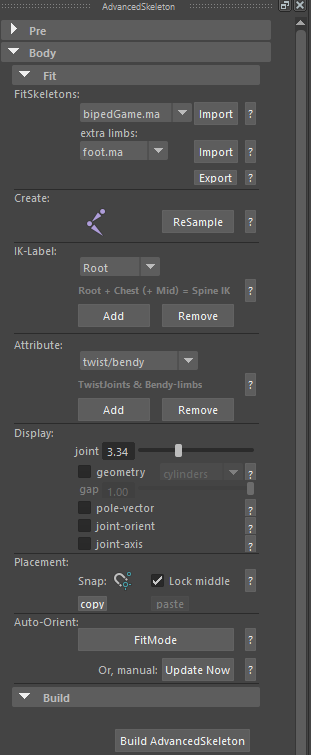
- Use Advanced Skeleton Rigging Tool to create a rig
- Fit Skeletons: Select bipedGame.ma for Unity compatibility
- Auto Orient: Fit Now and click Update now
- Click Build Advanced Skeleton to create Rig
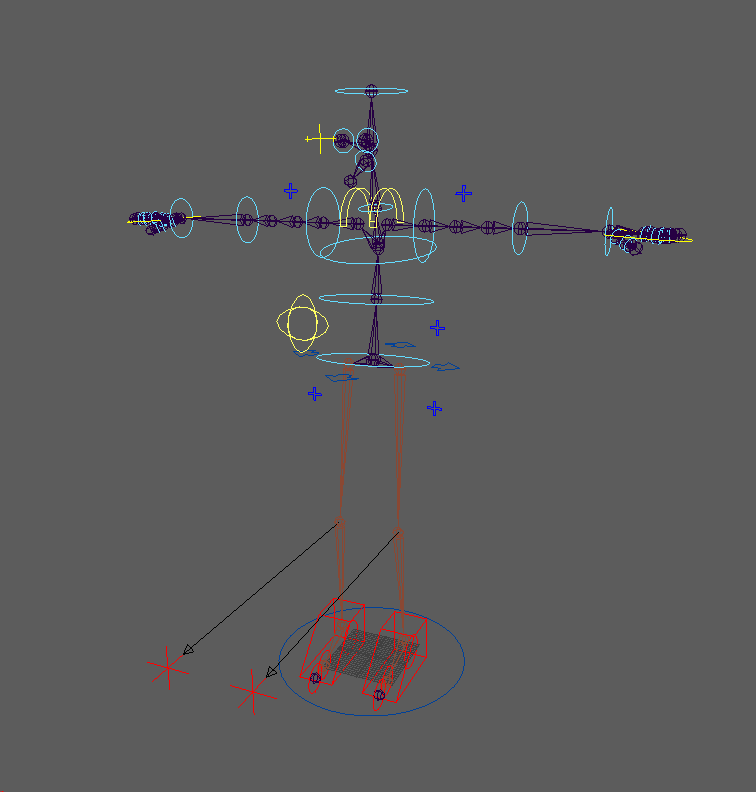
- Model your character in T-Pose and not Y-Pose to connect the mocap data.
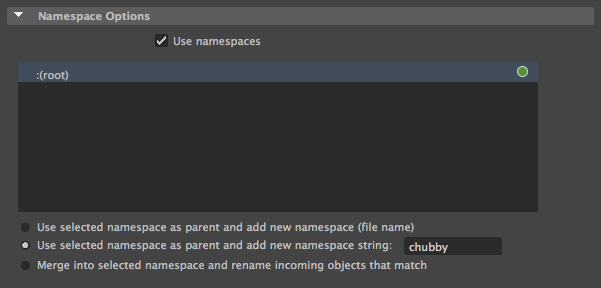
- File > Create Reference… and choose model file and namespace to link to. Set a short namespace, which is important for import/export.
Before we can use mocap data, we need to characterize (link each joint to a global label/character node):
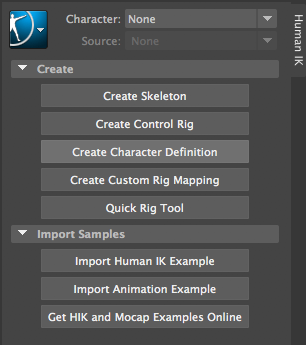
- Display HumanIK: Windows > Animation Editors > HumanIK
- In HumanIK click on Create Character Definition
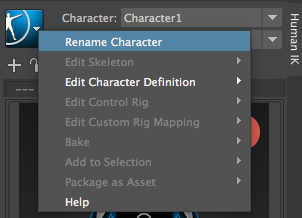
- Rename Character by clicking on the blue icon > Rename Character
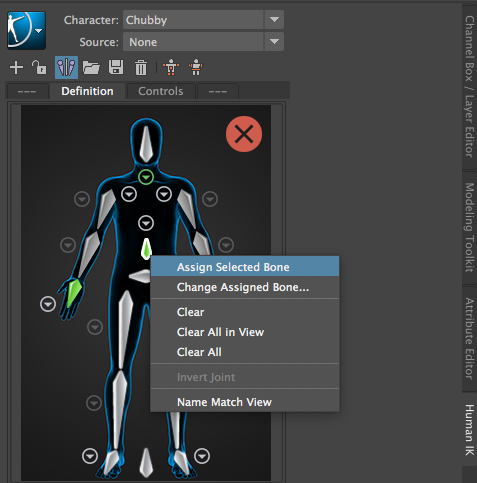
- Map Joints from Outliner to HumanIK (map only main joints, part joints not need to be mapped) by:
- Select Joint in Outliner
- Right click on corresponding joint in HumanIK Character Definition and select Assign Selected Bone
- Map Root in Outliner is the Hip in Character Definition
- Map Chest to the first Spine (Spine1)
- Map Neck the first neck (Neck) joint
- Go on with all other Joints.
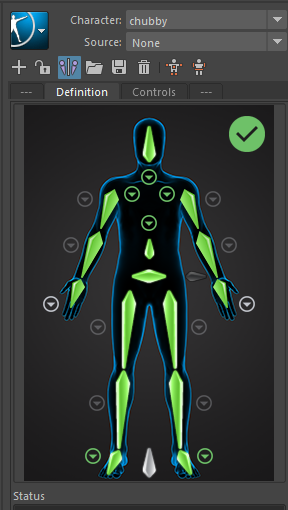
- If the green checkmark is displayed, everything is OK. The character will get orange if there is a problem.
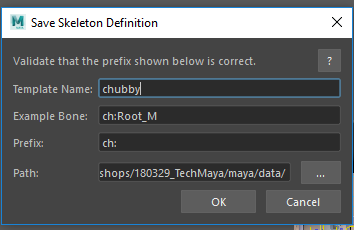
- Save Skeleton Definition at the end by clicking on floppy disk symbol at HumanIK window.
- The prefix of the skeleton definition needs to be changed since we use a reference. If we import the mocap data, there will be a Namespace (name of the Character in Motive). Delete the “Root” of of the prefix but leave the “:”. Change the path to the “data” location in your maya project.
- Save the Scene

Remarks:
- Map Shoulder does not work if character is not in T-Pose. Rotate Arms so that the Model is in T-Pose until character switches to green.
- Also the feets must be parallel to the Z Axis.
- If you change the model, make sure to clear the assignment data before reassigning the bon it to refresh the offsets. The offsets are calculated when you assign the bones.
- If you create a new scene, you can import the saved skeleton definition so you don’t have to do it once again.
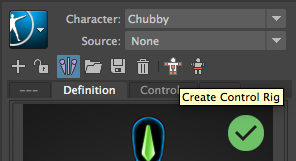
We do not key joints directly. We key curves/controls in order to fix mocap problems. So we create a custom control rig:
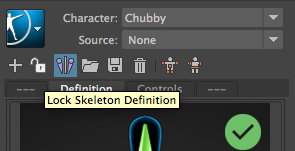
- Unlock the Character Definition by clicking on the lock in Human IK.
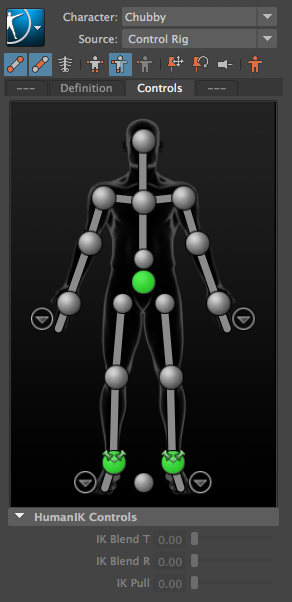
- Click on “Create Custom Rig Mapping” in Human IK.
- By default, it assign ankles and hips.
- Connect controllers to the control rig by select the controller and right click on corresponding control rig point and “Assign selected Effector”.
- Disconnect the translation on the head (deactivate Map Translation).
In order to import motion capture data, you need to export the correct format (FBX Binary) in motive. Choose File > Import and import the motive FBX binary file.
Also the mocap data has to be characterized:
- Grab all Joints of the mocap
- Open channel box and set Rotate X,Y,Z=0
- Select Hip joint and set Translate X=0 and Z=0
- Select Hips and Translate Y until the that character stands on the ground
- Open Human IK and click Create Character Definition
- Rename the character to “Mocap”
- Assign all bones from mocap skeleton to character by selecting bone in skeleton and right click on character “Assign Selected Bone”.
- Save Skeleton Definition. There is no need to change the prefix. Change to location to your maya project. Change Template name to “mocap_CD”.
- In Human IK, select the character the character to animate, and select as source the mocap character.
- Select the pole vector and set it to follow (10) in channel display.
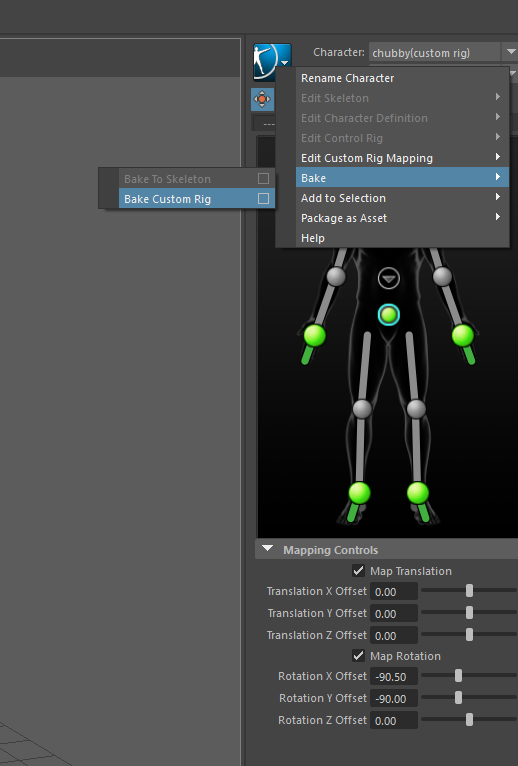
- You need to bake the mocap animation to the Human IK skeleton: Human IK > Bake > Bake Custom Rig
After that, you can start clean the Mocap Data.

- Import Options > Set File Type to FBX
- Import Add and Update Animation: it will just update the motion data. You do not have to recreate everything.
- Select the Controller to fix
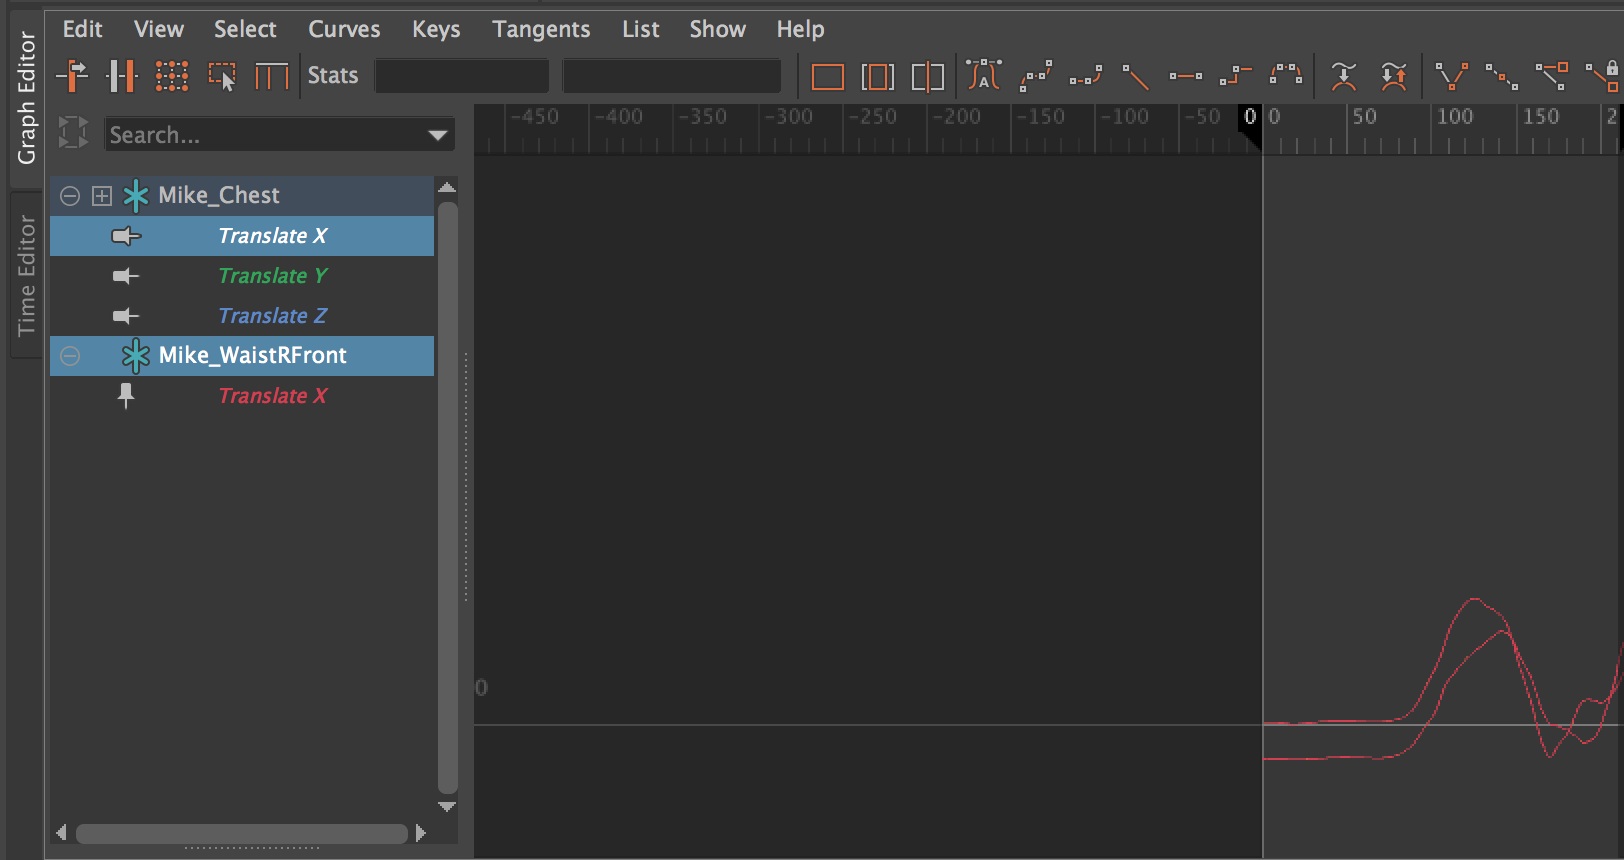
- Window > Animation Editors > Graph Editor
- Select parameter to fix and mark area/time range to fix with mouse
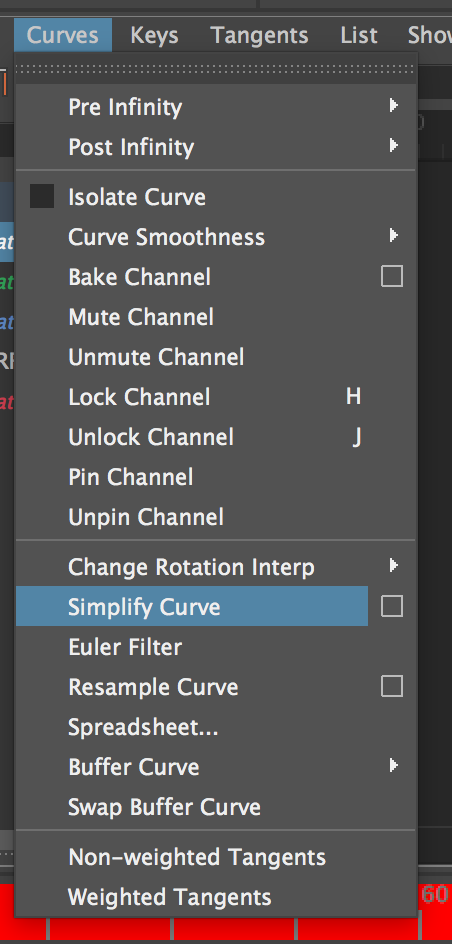
- Curves > Simplify Curves (set start and end frame)
Do not Simplify over a whole take at once.
- Open the original character file
- Export only Deformation System for Unity: Open Deformation System in Outline
- Select Root and Geometry.
- File > Game Exporter: Export only selection, use File type FBX (Binary).
- File > Export Game
- Use FBX 2018 filetype
- Activate Animation in Export window.
- Activate Bake Animation
- Add Animation Clips in Export Window.
Blendshape Implementation
It’s important to distinguish between the geometry driven by the blendshapes, later used in Unity, and the geometry that is only going to be deformed by the skeleton.
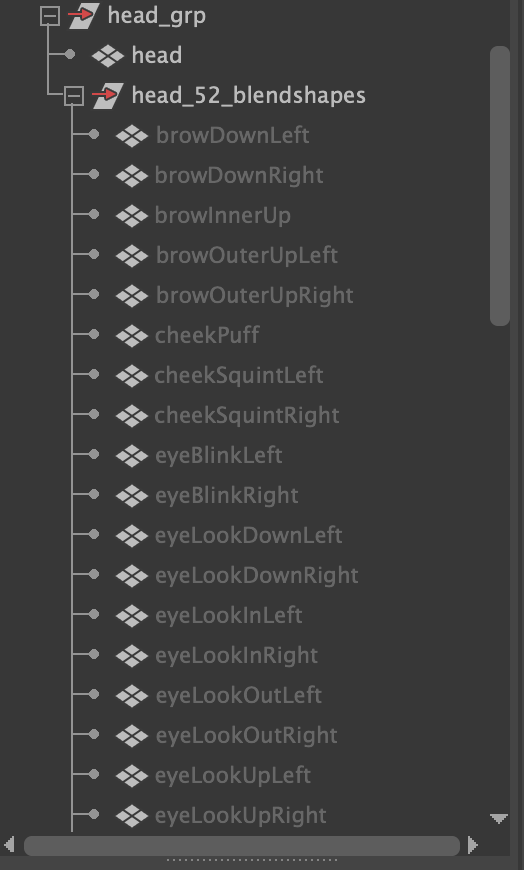
Due to organisational reasons it’s recommended to visually distinguish your mainhead from your blendshapes in the outliner.
As you import the head and the blendshapes into the scene, pack them all into a group (ctrl+g) and then pack all the blendshapes inside of that group into a group again.
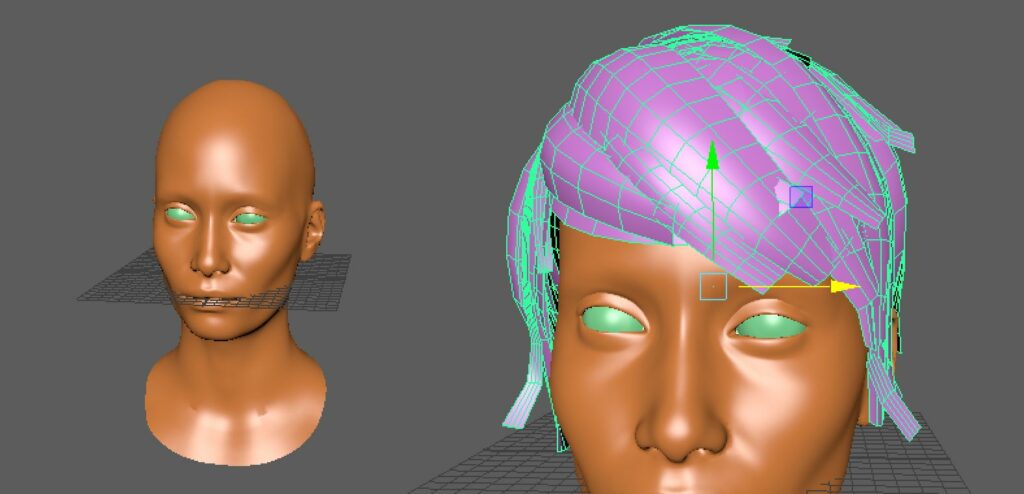
Here it’s also important to mention that if your character has some additional assets on the head that are separate objects and don’t move with the blendshapes (for example a hair asset, a hat, or jewellery), that you keep that as a separate object as well to later connect it with what comes to be the body geo, or leave it out at all and just place that in unity based on a modular library of assets.
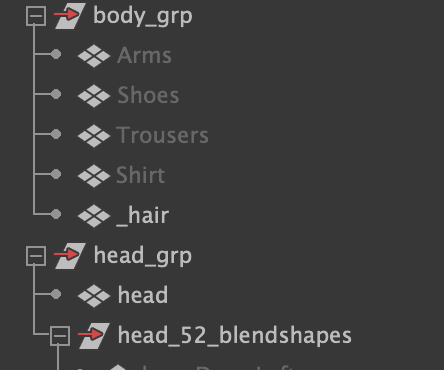
If your body mesh consists of different objects, don’t forget that you’re rigging for a realtime application. If you apply a skin cluster to all the different objects, that means the mesh of all those separate objects are accessing the entire rig again. Select everything that doesn’t belong to the blendshape setup and add it to its own group. Later we will combine all those objects to become one single mesh.
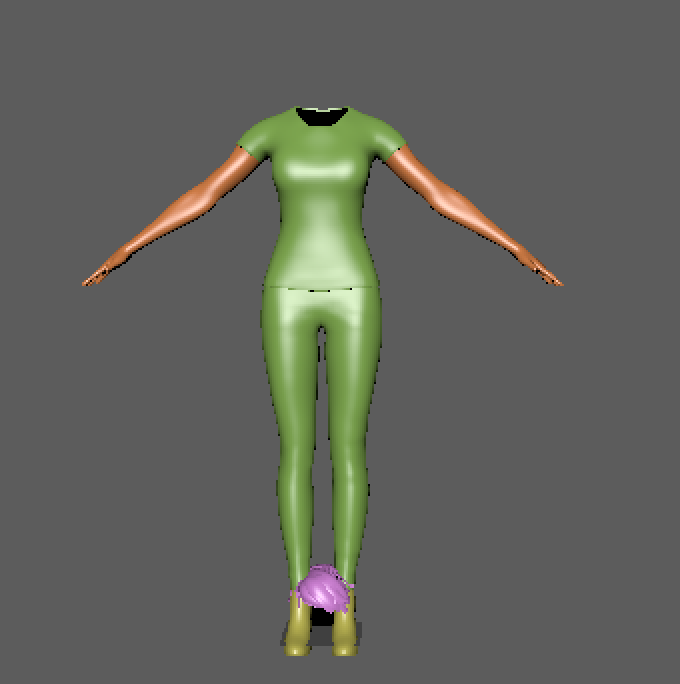
If you imported the head from an external application that made or assembled the blendshapes automatically for you, then it’s very possible that you’ll find the head in the center of the scene. Before joining anything make sure to place everything in the position it’s supposed to be. Select the “head_grp” and if available also all the objects that decorate the head (hair, hats, jewellery) and move everything to a spot where it merges well with the body.
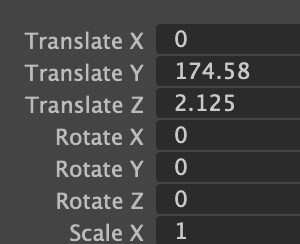
The coordinates of all the objects you’ve repositioned have changed. The problem here is that the mesh components inside of those objects will be bound to a skeleton that will move them in 3d space, while they’ll still be thinking that they are in the location space defined by the object you have moved. That might lead to quite some deformation troubles as you export the rig later.
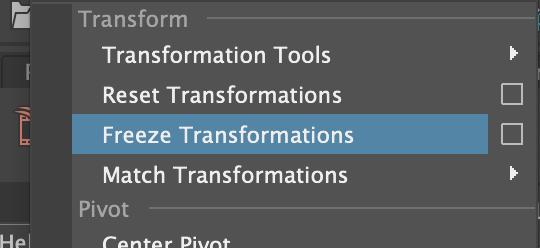
To avoid future troubles, select the “head_grp” and all additional objects whose position you have changed and go to “Edit”/ “Freeze Transformations”. That way object transforms get nulled out while mantaining their current position.
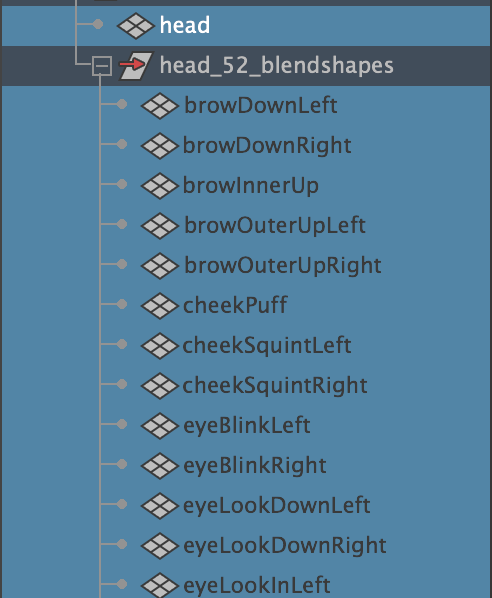
Select all the different face geos inside of the blendshape group. Then shift select the “head” geo outside of the blendshape group. Go to “Deformers” and create a Blendshape. You have the option to give it a name. In this example we gave it the name “Posemorph”.
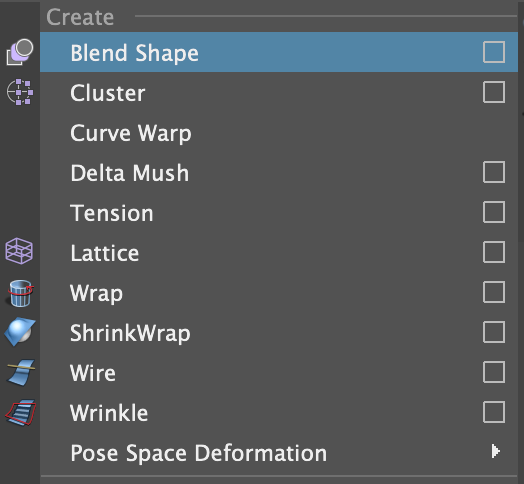
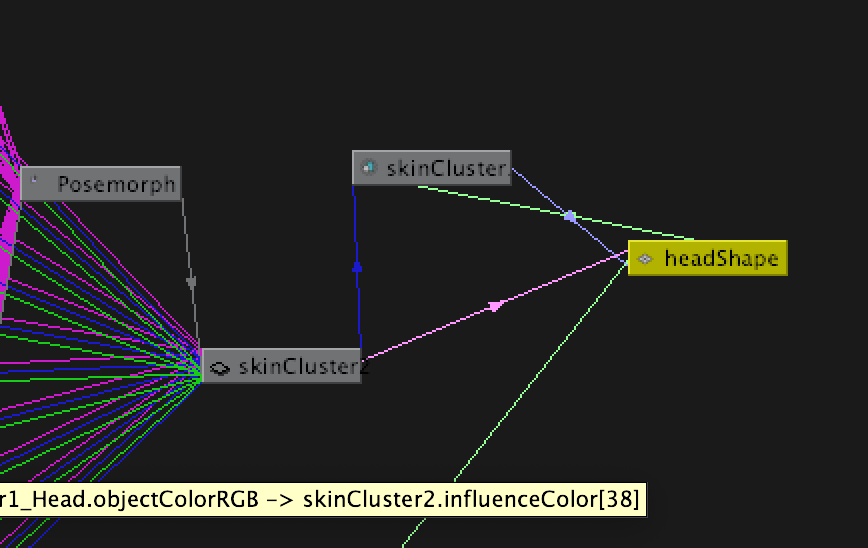
We apply the blendshape deformer on the head before binding the head to the rig. Since the blendshape deformer drives the position of the points on the mainhead, we basically subjugate those points to be driven by the skeletton by applying the skin deformer afterwards.
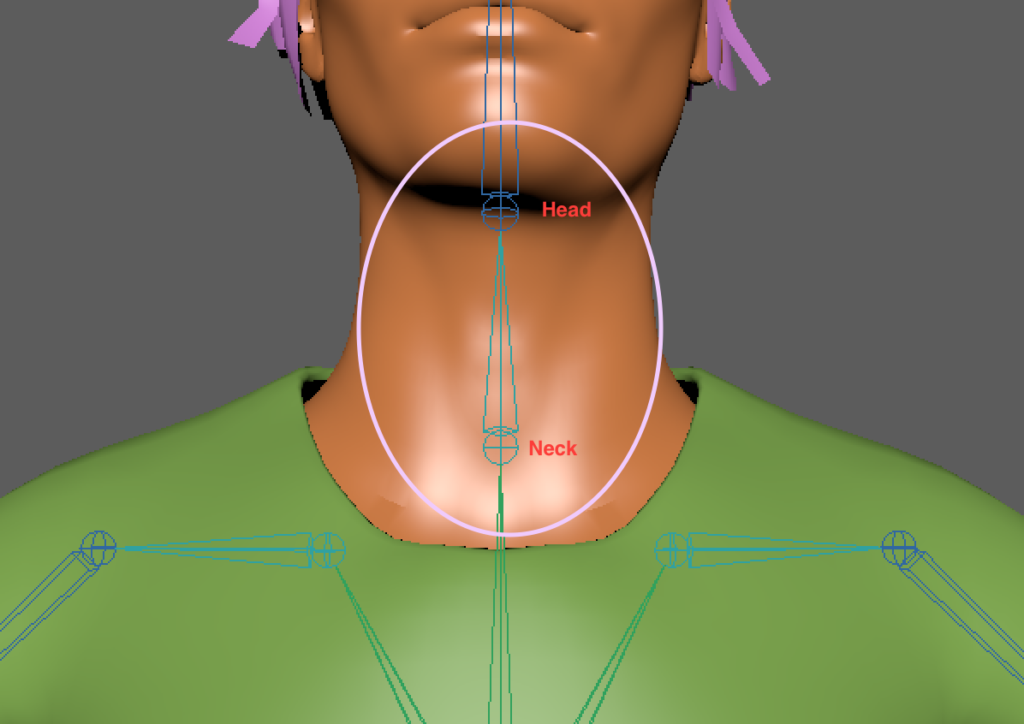
Depending which skeleton you’re using. Either if it’s a self made one or the human IK preset that you have manually adapted to your model: It’s important that you place the bones correctly. For the head you have to position the head joint at the height of the lower jaw. Else you’ll end up with a pre Nolan Batman Style head rotation.
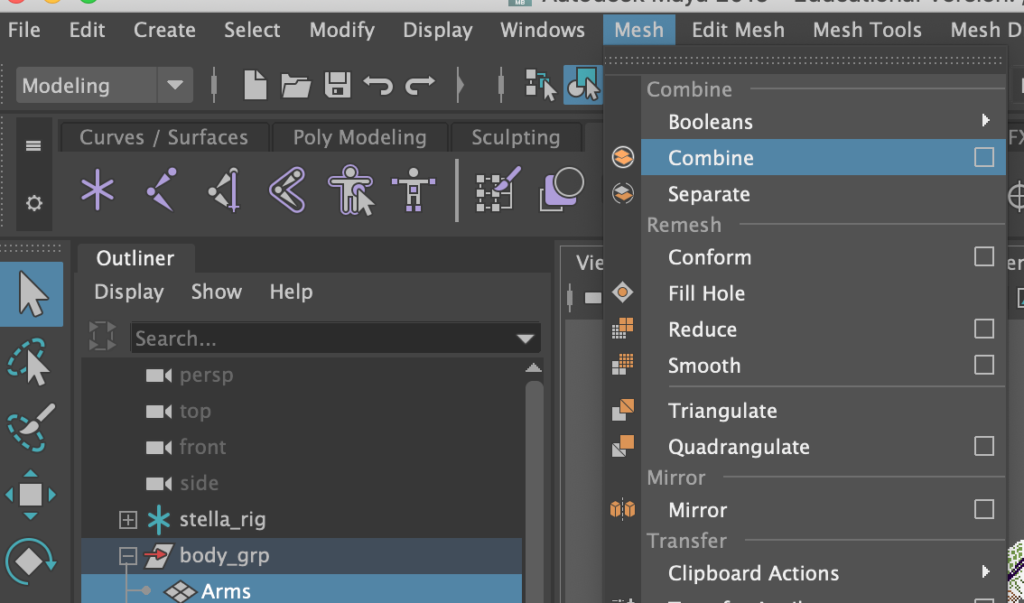
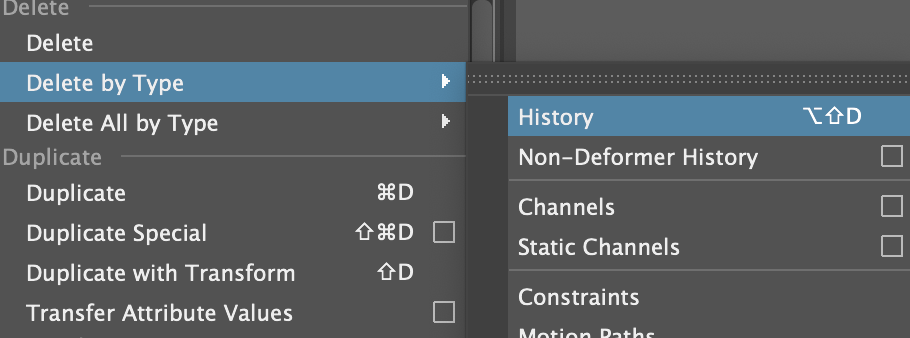
If the body consists of different objects. There is no point in keeping them separated. Select them all and connect them. Then go to “Edit”/ “Delete by Type”/ “History” . Now the body consist of one single mesh and it’s only that mesh that will access the skeleton.
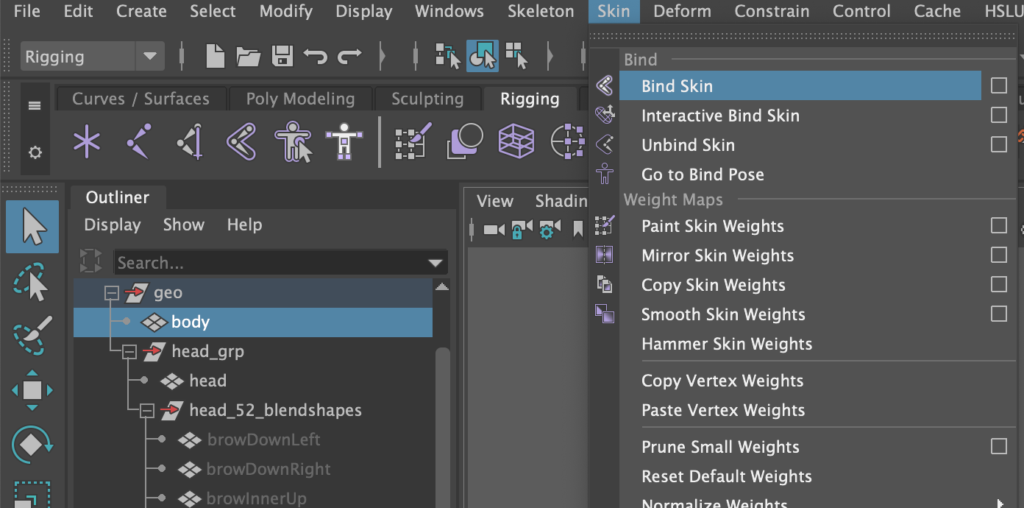
Now select the body mesh and bind it to the skeleton.
If you’re approaching this the “classical” way (e.g. no automated auto rigs and binders) this might become a slow and painfull process.
Theses are some steps that can speed up your workflow.
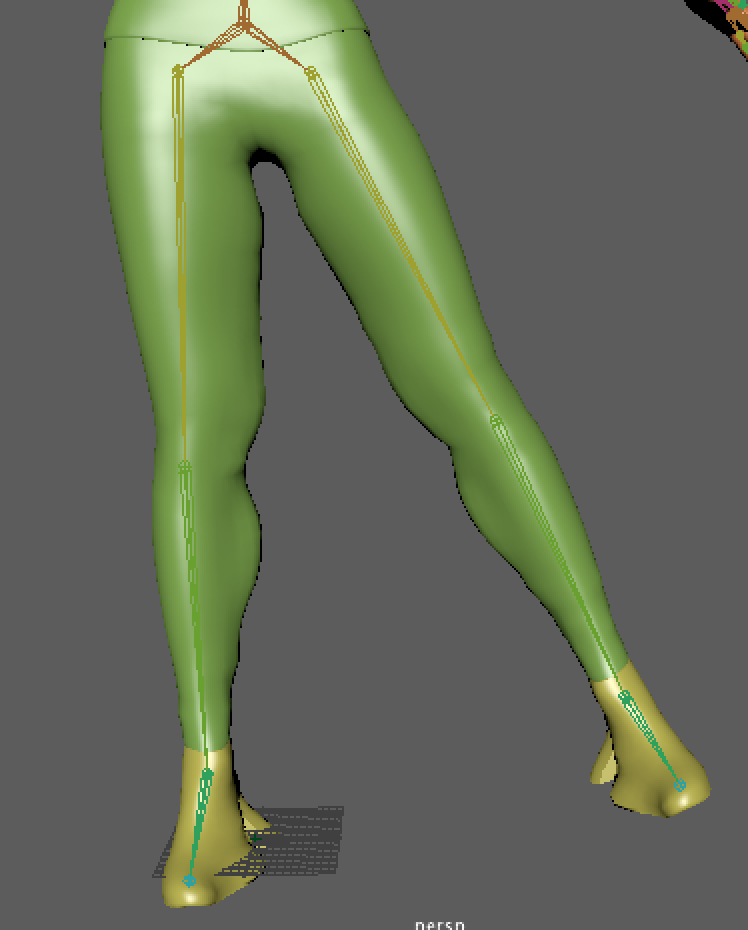
This kind of problem originates from bone weights accessing parts of the mesh that are close but that they shouldn’t be accessing at all.
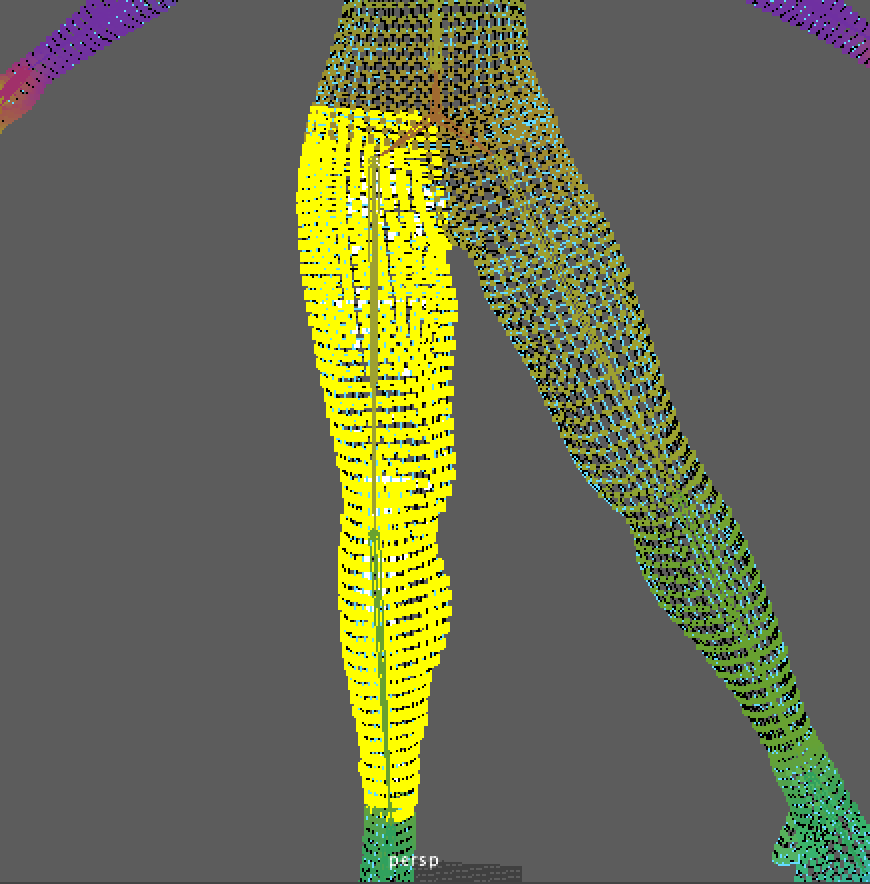
Select either the left or the right side of the mesh.
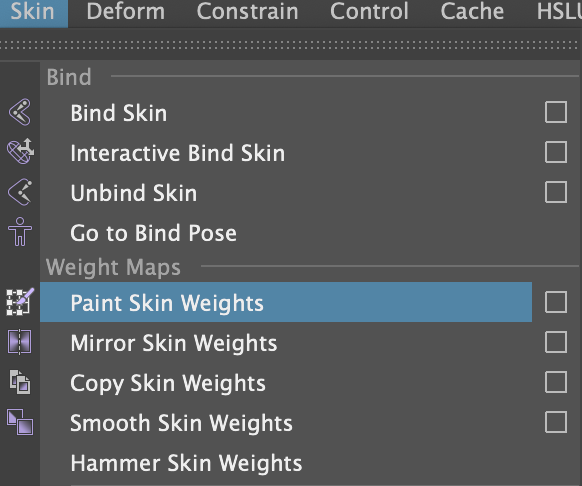
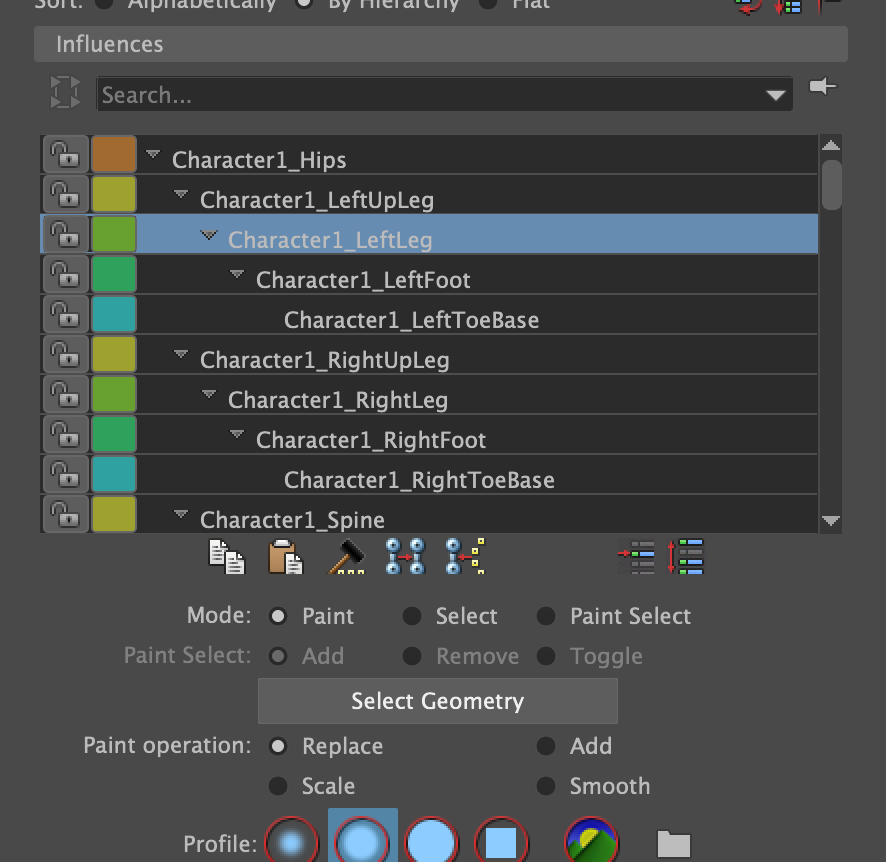
Go to “Paint Skin Weights” and select the Bone whose influence you want to remove from the selected mesh component. In this case it’s the left legs influence I want to remove from the right leg.
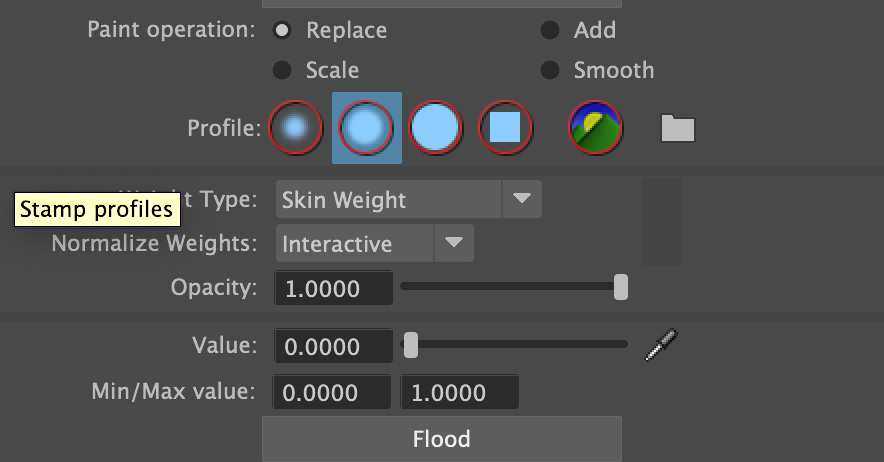
Then go to the parameters of the tool. Select “Replace” and put Value to “0” and Opacity to “100”. Then click “Flood”. This will eliminate all the influence the bone you selected has on the currently selected points.
If other parts of the body are deforming weirdly, like for exaple the chest or the neck. It’s because the distribution of the weights is not accurate to the corresponding movement of the affected bodypart. Work your way through. Apply and paint weights until you’re happy with the way either the left or the right side of the body deforms.
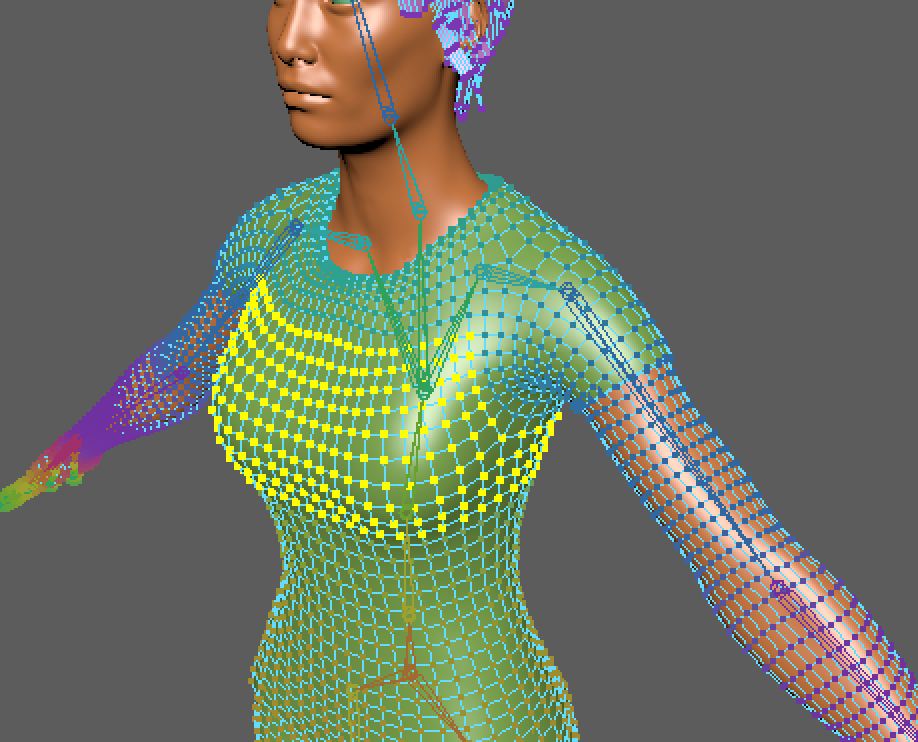
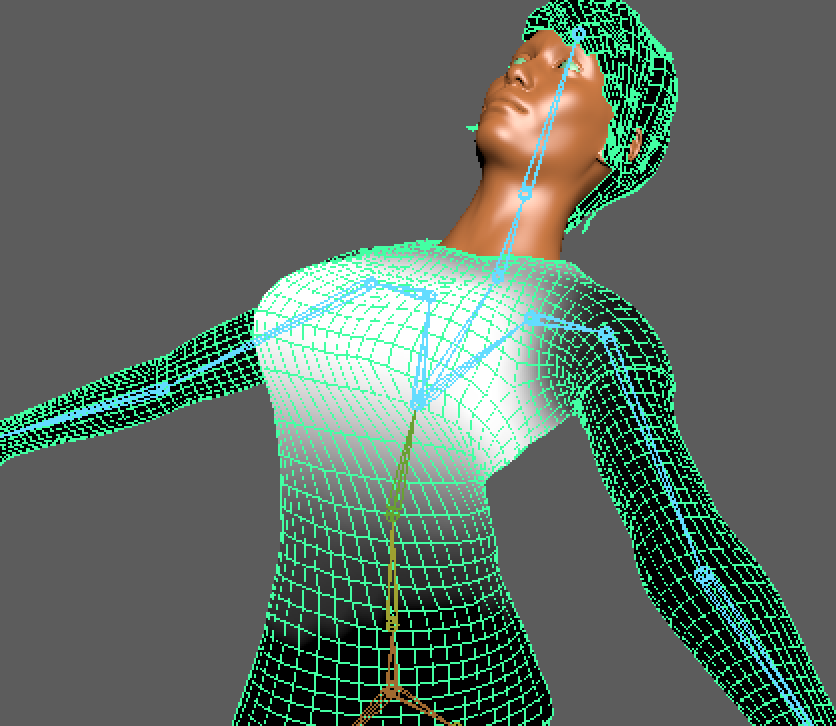
Once you’re done. You can go to “Skin” / “Mirror Skin Weights”.
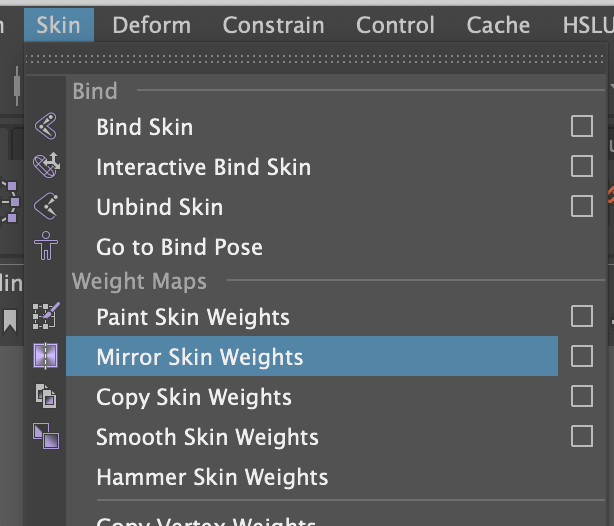
Then, after some smoothing and tweaking, your avatar should be deforming quite decent.
